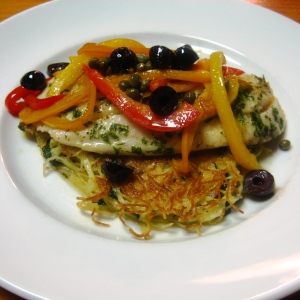
Recently, Mardi of eat. live. travel. write. invited me to participate in an event called Hay Hay It’s Donna Day! From what I understand, Donna Hay is something of a Canadian* Martha Stewart, and some lovely food bloggers have joined together to create recipes of hers and celebrate her work.
While I no longer consider myself a recipe blogger, having let my kitchen witch blog fall by the wayside lately, I couldn’t resist Mardi’s offer. After all, it was an honor to be included by Mardi in the first place. Even more importantly, though, was the fact that this recipe is dead simple. I mean, I had everything I needed in the fridge or pantry already, it didn’t require any cooking or baking and it promised to be delicious. So, I decided to jump in.
While I just claimed to have everything I needed in my general cooking supplies, the recipe calls for caster sugar and the truth is I don’t stock caster sugar in my pantry. Caster sugar is granulated sugar that is superfine in texture. It is not powdered sugar, however, as powdered sugar is powdered (hence the name) not granulated and has cornstarch added to it. Caster sugar is something between regular granulated sugar and powdered sugar. It is suitable for cold recipes, where you don’t want the texture of the grains of sugar to be pronounced. With cold recipes, since there won’t be any melting or dissolving of the sugar due to heat, the super fine texture is important.
I’m here to tell you that for this recipe, and any other calling for caster sugar, you need not run out and buy a special bag of superfine sugar. You can make your own, just like I did. How? Simply place the amount of regular granulated sugar called for in your recipe into a food processor or blender. Pulse or blend for about a minute or until you feel that the grains of sugar have been refined. Voila! You have just made yourself some caster sugar.
Other notes about this recipe:
- As Mardi pointed out in her introduction to the recipe, it works quite well with heavy (or double) cream in place of the single (light) cream. That is what I have on hand, so that is what I used.
- Cream cheese comes in 8-ounce bricks, which is 227 grams. This is 23 grams shy of the 250 grams called for in the recipe, but I used only the 8-ounce brick with great success.
- I suggest putting the cream cheese out at room temperature for about 30 minutes before making your cheesecake pots, as softening will help it to incorporate more easily.
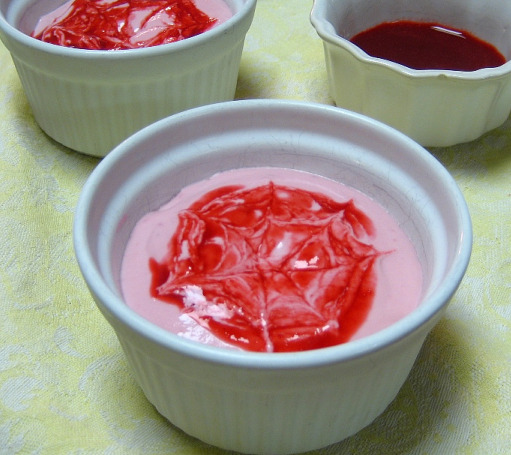
- I used melted cubes of frozen raspberry puree from last summer in place of the blackberries. About 4 cubes were enough, but I did weigh how much I put into the mixture (60 grams, saving more puree to drizzle on top). Using pureed raspberries instead of whole fruit provided an ultra-smooth texture that I knew my family would prefer.
- My entire family LOVED this. I was surprised, as my kids can be suspicious of anything new, but every ramekin was cleaned out. Even my husband–who is not a huge a fan of sweets and usually defers on dessert right after dinner– was enamored of the Raspberry Cheesecake Pots. I will be making it again this week!
Thank you, Mardi, for including me and introducing my family to Donna Hay and this luscious, wonderful summer dessert.
*Mardi has informed me that Donna Hay is actually Australian! Shows what I know. 😀
Donna Hay’s Blackberry Cheesecake Pots
Ingredients
• 250g cream cheese
• ¼ cup (55g) caster (superfine) sugar
• ¼ cup (60ml) pouring (single) cream
• 1 teaspoon vanilla extract
• 120g fresh blackberries
• 8 biscotti, to serve
Method
Process the cream cheese, sugar, cream and vanilla in a food processor until smooth. Add half the blackberries and process until just crushed. Spoon into 4 x ½ cup-capacity (125ml) dishes and refrigerate for 1 hour or until firm. Serve with the biscotti and the remaining blackberries. Serves 4.
Don’t forget to swing by TasteStopping for your daily dose of food photography, rejected and fresh!
Daring Bakers and a shift of focus
The February 2010 Daring Bakers’ challenge was hosted by Aparna of My Diverse Kitchen and Deeba of Passionate About Baking. They chose Tiramisu as the challenge for the month. Their challenge recipe is based on recipes from The Washington Post, Cordon Bleu at Home and Baking Obsession.
When I started this blog nearly a year ago, I thought I could drive some traffic to my baking business by posting here and there about the goings-on of kitchen witch while throwing in some gorgeous photos of things like Fudge Brownies and Apricot Ginger Scones.
In the months that followed, I started Twittering, launched a new website, and made many blogging friends along the way. I also learned that food blogs containing pictures and stories are nice and all, but what visitors really want is a recipe. Which causes my blog to feel like a culinary no-man’s-land sometimes, as I am reluctant to share the recipes that go along with those photos of Fudge Brownies and Apricot Ginger Scones. I made the business decision early on that recipes of the products I sell, while not exactly original copies of the Magna Carta, still deserve to be held close.
There is only one solution: change my goals for this blog. While I would still love to drive traffic to my ecommerce site, I think it is an uninteresting use of my time and perhaps even a bit disingenuous to my visitors. At its center, blogging is really about connecting, no matter the content of your material. Otherwise, you might as well keep a journal on your bedside table. With these things in mind, and considering that there will still be many recipes that I choose not to share, I am going to try something new here.
A lot of blogs attempt to reach a larger audience by taking on a challenge. Consider Julie Powell working through the recipes in Julia Child’s Mastering the Art of French Cooking in one calendar year. Or the various baking and cooking groups that are prevelant throughout the Internet, such as Daring Bakers and Cooks, Tuesdays with Dorie and Foodie Fights. It has been said that there is no more need for the “cook/bake/stress my way through” another cookbook scheme-turned-blog, but I think I have hit upon something that just might take that idea and give it fresh legs.
From this moment forward, my blog will be devoted to detailing my journey as I take kitchen witch from a home-based business to a retail, brick and mortar outlet. Maybe a bakery or a hybrid cafe, maybe a restaurant or simply a lunch counter, one way or another, I believe that’s where I am headed, and I give the possibility a lot of airtime in my private thoughts. I read books that might help, I tune in to television programs on this topic that catch my attention and I dream.
While there is a lot to say about where I am headed with both the dream and this blog, let me save that for another post so that I may instead focus on this month’s Daring Bakers challenge and how it fits into my new vision.
If I look back at the few months in which I have participated in the Daring Bakers challenges, I would probably detect a common thread in all of my posts. I often feel pressed for time, stressed out and generally annoyed by the challenges (never more so than at the holidays when I really shouldn’t have tried to fit in one. more. thing. Let alone a gingerbread house!) I have often questioned why I joined Daring Bakers if I find the process so frustrating at times. I didn’t have an answer for that until I decided to use this blog to chronicle my journey as a small business owner.
You see, the Daring Bakers challenges are great experience for me in my future life, as I am constantly pushed to make new recipes, employ unfamiliar cooking and baking techniques, and come up with successful dishes. Doing these things puts me in the role of learner, a fabulous place to be in that it gives me insight into what future employees might be thinking as they create some of my pastries for paying customers. It also expands my repertoire. Six months ago I didn’t know what a macaron was; today I would put it in my rotation of sweet treats had I a bakery out of which to make and sell them.
This is how tiramisu becomes the first of the DB challenges that will be put under the culinary microscope as I mull over the question, “Will I serve this in my restaurant?”
The answer is a resounding “No.”
I did not have an easy time following the recipe for this dessert, which is probably much less complex than I made it out to be. There is marscapone (which took me five times longer to make than the recipe provided stated), zabaglione (pretty easy), pastry cream (pretty easy), whipped cream (no brainer) and ladyfingers (also known as savoiardi biscuits, fun to make although takes some practice to really master). There are flavorings of choice (Marsala, port, espresso, rum), and assembling issues. There is the slight snag that, having never made tiramisu before, I couldn’t figure out from the directions that I needed to assemble the different parts in a walled container (like a cake round or a 8-inch square pan). I used a flat, decorative tray, and the results were sloppy to say the least.
Okay, so removing my mistakes and difficulty reading instructions, the building blocks of this dessert turned out well for me and would be easy enough to replicate on a larger scale (for a restaurant). And, with a little practice, I actually think that the assemblage of the different layers would become easier and easier. So what it really boils down to for me is taste. While pleasant enough, the tiramisu that I ended up with was non-traditional to the point of being off-putting due to the addition of lemon peel in several of the components of the dish (the zabaglione and pastry cream). That just didn’t work for me.
I suppose I could omit the lemon from the recipe in the future and add some rum to the espresso soaking mixture (which I left out so that I could share this dessert with my kids). I could soak the lady fingers in the espresso mixture for half a second longer than I did this time. I could use the appropriate dish to assemble and freeze it instead of simply refrigerating the finished product. Even though it might only take a few little tweaks such as these, I am not convinced. And to be fair, it could be that even a perfectly-made tiramisu wouldn’t convince me because it is just not my preferred dessert. But regardless if it is the taste, the process or the way it looks on a plate, I have to go with my instincts on this.
Because when it is my store that you are walking into, I want you to be blown away, whether by the Ultimate Cookies or the Apricot Ginger Scones or the Maple Syrup Macarons. But for now, it won’t be by the tiramisu.
**************************
And as always, if you are looking for a home for your rejected or fresh food photography, be sure to visit TasteStopping to submit your photos.
Happy Macs
I love making macarons. Seriously. Now that I am comfortable with the process and have a few successes under my belt, I just really love it. Plus, the end result is so very tasty.
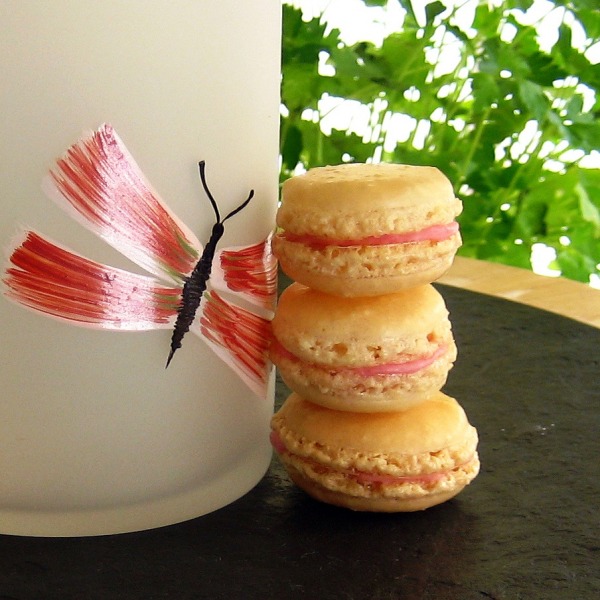
My latest macaron making adventure was inspired by MacTweets, which has issued a Valentine’s Day theme for this round of macarons. When I think of Valentines, I think of pink and red hues, so I decided to run with those colors and see what would happen.
For this challenge I ditched the ground almond meal from Trader Joe’s that I have been using, as it contains the almond skins. While the skins don’t affect the overall taste of the macs, it definitely creates a different look. Instead I used blanched raw almonds, ground them myself with a bit of the requisite powdered sugar, and strained out large pieces. However, I didn’t strain it to only include the powder. My macs still had a little texture to them.
Once my macaron batter was prepared, I separated it into two bowls so that I could add all-natural food coloring to one of the bowls. The result was a white macaron batter and a pretty pink macaron batter. However, strangely enough, when the macs baked, all the shells looked very much the same. Beige and pinky beige. After I took them off the sheet pans and mixed them together, I could honestly no longer tell which had food coloring. So, I will be trying that again, with more food coloring, I guess.
This left me with only the filling to color. I had in mind some kind of raspberry puree or jam for the middle layer, but I wasn’t quite sure how to pull it off. Truth be known, I was being too lazy to go online and find a suitable recipe. So, I simple blended together puree from my freezer, some powdered sugar and salt. Lots of salt. Too much salt. The macarons that resulted looked, in my husband’s opinion, like tiny candy hamburgers. You be the judge.
Having ganache in my fridge at all times, I resorted to putting that in some of the macarons, but I will declare here and now that I do not prefer dark chocolate in my plain macarons. It overpowers the delicate almond flavor of the pastry. While I will eat chocolate any other time, I will no longer fill my macs with it. Unless of course they are dark chocolate cocoa macarons or somesuch thing.
This left me with one option. I had a little dollop of cream cheese frosting left over from a batch of cinnamon rolls made about a week or so before I made the macarons. I added a few drops of the raspberry puree to that and came away with a lovely, tangy filling which interplayed nicely with the almond macaron. It was neither too sweet nor too fruity. And, in the spirit of all that is Valentine’s Day, it was a lovely light shade of pink (not at all reminiscent of hamburger meat!)
Here are several things I pondered in my baking and filling.
- The drier the batter, the more proper the feet. My batter, especially with the food coloring, was a little on the loose side, resulting in my wildly splayed “feet.” I will work toward reducing the wet ingredients in my next batch to address this.
- Undercooked macarons leave a dome shape to be filled with extra filling (if you want it to press out nicely along the edges of the feet). This can result in TOO MUCH FILLING. A small schmear is called for, nothing more.
- I prefer a salty filling, but my first attempt at a salty raspberry filling was overboard. Without the balancing addition of salt, macarons can be just too sweet. I’m shooting for a salted caramel filling for the next go round, but that will also depend on the MacTweets challenge.
- I went back to whipping the egg whites with my stick blender (whip attachment) and this worked just fine. I started with the whisk turned off, and hand-whipped for 30 seconds to break up the whites and start incorporating air. Then I turned the blender on and ended up with a suitably whipped egg white.
Can’t wait for the next installment. For more luscious looking macarons, visit the MacTweets website!
Oh, and as always, remember to visit TasteStopping to see what rejected photos we publish next! Better yet, submit your own photos (rejected or fresh content to the Drive-Thru).
Short and sweet
The December 2009 Daring Bakers’ challenge was brought to you by Anna of Very Small Anna and Y of Lemonpi. They chose to challenge Daring Bakers’ everywhere to bake and assemble a gingerbread house from scratch. They chose recipes from Good Housekeeping and from The Great Scandinavian Baking Book as the challenge recipes.
For weeks now I have been trying to figure out a way to do justice to this month’s Daring Bakers Challenge. I was planning to make a gingerbread house with my two girls during the holiday season. However, were it not for the Daring Bakers Challenge aspect of the project, it would have been abandoned. Why? Not because it is hard, not because it is time-consuming, not because of all the candy I bought that they will now consume. It is not for any of those reasons, and also for all of those reasons.
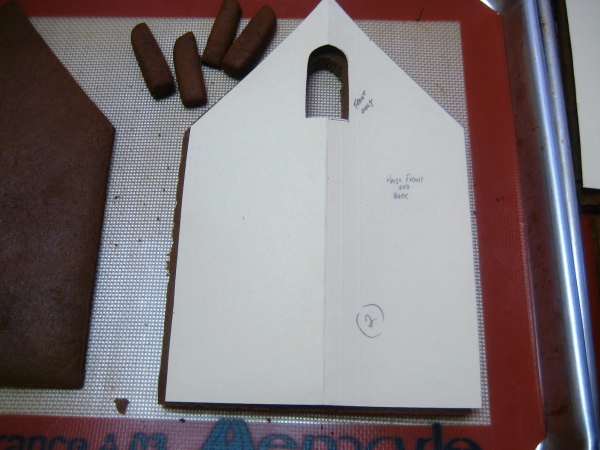
The house was not hard to make, per se, it’s just that it requires working in stages. So, the 7-13 hour time commitment is no joke, but for me that was spread out over several weeks. Naturally, by the end of it, I am somewhat annoyed with and sick of the gingerbread house sitting on my kitchen table. At the same time, it is the most beautiful and fun creation I have possibly ever made, factoring in the help from my daughters, their neighborhood BFF, my husband and my father. Yes, my parents happened to be visiting when I decided to do the baking portion of the challenge, and I put my father to work creating the template (which I took from The All-American Cookie Book, a fabulous tome by Nancy Baggett). Had not each of these people helped me out at some point along the way–the girls decorating, my husband helping me glue and support different parts of the structure, and my father precisely measuring and cutting out the design–this house would never have been made.
Perhaps my frustration lies in that fact: this was not a Daring Bakers Challenge, but a Daring Baker and her entire family challenge. It could also have something to do with the fact that this time of year is insanely busy for any normal person. Add a cookie business to the general holiday mayhem, and a gingerbread house may just put one over the edge. My father chuckles as he fondly refers to this project as my “death wish.”
Without any further ado, I bring you some photos of this gorgeous gingerbread house that perhaps only a mother (or Willy Wonka) could love.

Two roof panels, and the back of the house, decorated by my daughters and one of their friends. In retrospect, adding candy after gluing the structure together may have been wise.
Below is the recipe for the dough, given out by Anna, and adapted from Good Housekeeping. I found it to be extremely dry when I mixed it together, resembling sand. To remedy this, I simply added heavy cream until I thought it was moist enough to hold together. The end product was fine, although even more heavy cream would have been fine, too, and probably would have helped in the rolling stage, which was quite difficult. Also, I used my Hobart 10 quart mixer to do this. I cannot imagine anyone having success assembling this dough either by hand or with a 4 or 5 quart KitchenAid mixer. There is simply too much dough. Perhaps divide the quantities in half to solve this problem. And finally, I used the Royal Icing recipe also found in Nancy Baggett’s book. I like that her recipe calls for the addition of lemon juice rather than vinegar, as a matter of taste (literally). I found it to be easy to work with, and well-sealed it lasted for over a week in the fridge. She also provides a recipe for creating royal icing that looks the color of the gingerbread itself, thus masking any messes that might come up. Perhaps after the holidays I will edit this post to include that, because it is a nice trick to have up one’s sleeve.
(And don’t forget to visit my other labor of love, TasteStopping if you’re looking for more great photos, recipes, blogs and ideas.)
Anna’s Recipe:
Spicy Gingerbread Dough (from Good Housekeeping) http://www.goodhousekeeping.com/recipefinder/spicy-gingerbread-dough-157…
2 1/2 cups (500g) packed dark brown sugar
1 1/2 cups (360mL) heavy cream or whipping cream
1 1/4 cups (425g) molasses
9 1/2 cups (1663g) all-purpose flour
2 tablespoon(s) baking soda
1 tablespoon(s) ground ginger
1. In very large bowl, with wire whisk (or with an electric mixer), beat brown sugar, cream, and molasses until sugar lumps dissolve and mixture is smooth. In medium bowl, combine flour, baking soda, and ginger. With spoon, stir flour mixture into cream mixture in 3 additions until dough is too stiff to stir, then knead with hands until flour is incorporated and dough is smooth.
2. Divide dough into 4 equal portions; flatten each into a disk to speed chilling. Wrap each disk well with plastic wrap and refrigerate at least 4 hours or overnight, until dough is firm enough to roll.
3. Grease and flour large cookie sheets (17-inch by 14-inch/43x36cm)
4. Roll out dough, 1 disk at a time on each cookie sheet to about 3/16-inch thickness. (Placing 3/16-inch dowels or rulers on either side of dough to use as a guide will help roll dough to uniform thickness.)
5. Trim excess dough from cookie sheet; wrap and reserve in refrigerator. Chill rolled dough on cookie sheet in refrigerator or freezer at least 10 minutes or until firm enough to cut easily.
6. Preheat oven to 300 degrees F (149C)
7. Use chilled rolled dough, floured poster board patterns, and sharp paring knife to cut all house pieces on cookie sheet, making sure to leave at least 1 1/4 inches between pieces because dough will expand slightly during baking. Wrap and reserve trimmings in refrigerator. Combine and use trimmings as necessary to complete house and other decorative pieces. Cut and bake large pieces and small pieces separately.
8. Chill for 10 minutes before baking if the dough seems really soft after you cut it. This will discourage too much spreading/warping of the shapes you cut.
9. Bake 25 to 30 minutes, until pieces are firm to the touch. Do not overbake; pieces will be too crisp to trim to proper size.
10. Remove cookie sheet from oven. While house pieces are still warm, place poster-board patterns on top and use them as guides to trim shapes to match if necessary. Cool pieces completely before attempting to assemble the house.
Macarooned
For October’s Daring Baker challenge, I tried my hand at macarons for the first and second time ever. The first was a bust. The second was a success. I wrote about it here, because I believe I learned a few things along the way that could help other would-be macaron devotees.
My biggest source of help and support turned out to be Jamie at Life’s a Feast, and her blogpost for macarons. You can find that here. She and Deeba from Passionate About Baking have put together a monthly macaron challenge on a new website called “MacTweets.” I signed up to be part of the challenge, because when my macarons turned out well, they blew my socks off.
Fast forward a few weeks. I am in the middle of my busiest season, not only as a human being, but as a baker! Orders are piling up, ingredients are running out, and here I am late to the party, having not posted about my recent attempt at macs for the MacTweets challenge.
Let me say this. I still love macarons. I tinkered with mine a bit, adding some cinnamon to the recipe, and creating an apple cider glaze filing to go in them. I was hoping for something to cut the sweetness of my initial attempts, and thought I might end up with something akin to apple pie. The recipe I used is on the MacTweets site, with about 1/2-1 teaspoon of ground organic cinnamon thrown in. It was just enough, but probably made the batter a little dry. I still produced feet (my inglorious, unwieldly feet!), but the texture of the macs themselves waned pretty fast; rather than getting better over a few days’ time, they became a little stale.
As for the filling, I liked it. It was adapted from something I saw for apple cider doughnuts recently, and it goes like this. Take 1/2 cup of apple cider and reduce by about half. Then, whisk in enough powdered sugar until it is a drizzly consistency. More than you think you’ll need. (Also, when you glaze one of the macs, let it sit for a bit to let the glaze set up. Otherwise, like me, you’ll find the top macaron sliding all over the place and be forced to prop them up against something while they set. However, the glaze does set, so I think a little drying time would resolve the wayward tops.)
My biggest regret is that I do not have ANY pictures of these macs. There, I said it. I made them under duress, the night before leaving on a one-week holiday for Thanksgiving, with my two young daughters. Yes, I made macs instead of packing. I’m stressing myself out right now just thinking about it! So, I will show you pictures of my previous successful attempt, as the macs in question looked just the same. I mean, what am I doing to grow such ungainly feet? Next time I’m trying my own whole almonds, peeled and ground as fine as I can. I guess I’m just lucky that they have feet, right?
Notes to self
The days between mid-November and late-December are an admittedly busy time. There are potatoes to mash, turkeys to fry, cookies to bake and presents to buy. (Yes, I worked on that for all of fifteen minutes.) However, I am more than a little shocked by my own failure to write about one of the more joyous and eagerly anticipated events that recently took place in my world: the official launch of TasteStopping.
Since the end of May, 2009, I have been working toward the moment when TasteStopping would take that bold leap into the world of food blogging, lose the “wordpress” in its URL and start making me some hard-earned cash. I am happy to report that on November 19 (or was it 18?), 2009, my dreams came true. I launched the site, ditched the free hosting, and started raking in sums of money not seen around these parts since my days as a child laborer in Detroit.
All joking aside, the story behind TasteStopping is neither complex nor interesting, but I thought I might try to prove otherwise in a short Q & A session with myself, while also answering all of your burning questions about the new site.
Me: How did you come up with the idea of TasteStopping?
Me: I stole it. From myself. After TasteSpotting rejected a beautiful (read: off-center, white-balance-challenged, poorly composed) photo of Lemon Meringue Pie. In my defense, they had previously accepted a yellow cupcake with chocolate ganache frosting that was taken with the same camera. So I figured they loved my stuff. To find out otherwise was, in a word, mind-numbingly devastating.
Me: So your next step was to fire back with TasteStopping?
Me: My next step was to complain loudly and at fevered pitch to my husband, neighbors and the 1.5 people who read this blog.
Me: So what was the light bulb moment? The “aha” factor?
Me: It’s amazing what a Google search for “TasteSpotting pisses me off” can find. Turns out there were lots of frustrated bloggers out there who had been rejected for any number of random reasons (editor’s note: actually, between TasteSpotting and FoodGawker there are only three rejection commentary notes given. They refer to composition, lighting and the degree to which the photograph in question resembles each site’s founder).
Me: What was your marketing plan?
To beg foodies who had blogged (and later, tweeted) about being rejected to send their declined photos to me. Oh! And spamming commenting on blogs that had photos appearing on the big name sites. It seems to be working.
Me: Who sent in the first rejected photo? Besides me.
Me: Two names come to mind: Dorian (from food goes here) and Kate (from warm olives). Since then there have been a lot of great bloggers participating, although I suspect that there are about four hundred thousand that I haven’t reached, yet. Give me time.
Me: What are the biggest changes visitors can expect when they visit the new site.
Me: Certainly the biggest improvement is that now visitors will have a clear idea of how to lose belly fat.
Beyond that, the changes are somewhat behind the scenes. For instance, bloggers are encouraged to establish an account with TasteStopping, which then allows them to create their own posts (just as they would on their own blogs). Those posts wait in a queue for me to approve and post, which typically happens within 48 hours (barring any unforeseen bouts of H1N1). Bloggers who wish to continue to submit the old fashioned way now have a contact form on the Submit page, which offers a streamlined process for sending their photos. Those submissions can take up to a week to post because I am lazy.
Me: Any new features on the site?
Me: Yes, yes there are! First and foremost, visitors will notice the Drive-Thru on the right side of the homepage. It’s a scrolling index of outside posts that any blogger can submit as soon as they publish it on their own site. This way, visitors can come for the rejected photos and also find photos with links to the freshest food content out there. It’s kind of like FoodBuzz, except you don’t have to wade through 354 new messages and 716 friend requests in your inbox to get there. It’s just right there. On the right.
There is also a sorely neglected content area called Judge, Jury, Execution in the right sidebar which is supposed to get people talking. You know like, “Hey, why did this photo of my grandmother’s lebkuchen get rejected from every friggin site?” And then all of us chime in with helpful advice like: “Well, try some backlighting next time,” or “Have you ever heard of a light box?” or “Because nobody likes lebkuchen.” You get the idea. I’m sure once the goodwill and glad tidings of the season have passed, the gloves will come off in Judge, Jury, Execution.
Me: Why do you think the blogging world is drawn to TasteStopping?
Me: As food photography improves across the board, so will the criteria for acceptance at the elite sites become stricter and stricter. It won’t be long before they start ruling out photos based on color alone. You think I’m joking, but just ask Brown what kind of summer he had at TasteSpotting.
My point is, there will always be rejected photos in need of a second home and bloggers in need of some group therapy. Grab some tap water and have a seat in our circle.
Me: What does the future hold for TasteStopping?
Me: I’m taking TasteStopping on the road! In May I will showcase photos from the site at Camp Blogaway in Southern California. I expect this to snowball into invites from BlogHer Food 2010, FoodBuzz Conference 2010 (please disregard above comments) and next year’s Rockefeller Center Tree Lighting Special, just to name a few. Sponsorship opportunities will be available on a first-come, first snatched up basis.
Me: Closing thoughts?
As you can tell, the whole site is supposed to be a very tongue-in-cheek experience. I deeply appreciate all of the bloggers who continue to submit and put their rejected photos “out there” for others to see and learn from. And I’m always open to feedback of any kind. Except negative. I’m just too delicate for that.
Me: Seriously, people…thanks for visiting and enjoy! 😀
Just for the halibut
In the life of every (American) foodie, there comes a time when turkey, stuffing, mashed potatoes, cranberry sauce, pumpkin pie and sandwiches comprised of the same, lose their appeal. In fact, they collectively become personna non grata, as we collectively rebel against anything remotely resembling that holiday meal.
After travelling to Michigan for Thanksgiving (where there were too few vegetables and fruits present), we felt like we needed a good detox. This is the meal I chose to prepare for us last night. I copied it from the May 2009 edition of Greenwich Magazine, and it was printed there courtesy of Ten Twenty Post Restaurant in Darien, Connecticut.
A note about recipes provided by restaurants and their chefs. I am leery of them. Seriously. As the owner of a food-based business, I am skeptical of any food-related business that is willing to give away trade secrets. What I learned in the making of this recipe is that it does take some interpretation on the part of the cook (in this case, me). While not my strong suit (I prefer recipes that are tried and true and reliable), it was fun to push myself a bit to think about how best to achieve the final dish that sounded so good on paper. I have included my notes in the recipe, so that you might benefit from my trial and error. (Also, I halved this recipe, but my notes will apply to the full recipe as well)
Mediterranean Halibut
4 8-ounce halibut filets (We used tilapia. Turned out great, but a heartier fish would have been nice, too.)
3 T chopped fresh herbs (thyme, oregano, parsley) (Used fresh thyme and parsley from garden. No herbs? Not a deal breaker. Saute with just salt and pepper)
1 cup chopped red, yellow and orange peppers (See below that they call for julienned, actually, not chopped)
1/4 c sliced kalamata olives (More of these wouldn’t hurt)
1/4 c capers (More of these wouldn’t hurt, especially if you have a 2-year-old who mooches yours)
3 T olive oil (watch how you use this; more for the fish, less for sauteing the vegetables or they turn soggy)
4 ounces white wine
8 ounces softened butter (I couldn’t bring myself to use the full amount so I halved this)
4 capellini cakes
Press herbs into halibut and pan-sear until lightly browned on both sides; finish baking in a 375-degree oven (as needed). (My fish didn’t brown, but as soon as I saw it was cooked on each surface, I threw it on a plate into the hot oven. This yielded nicely cooked, moist fish.)
Saute julienned peppers, olives, capers, salt and pepper in olive oil. In a separate pan, reduce white wine and slowly mix in butter, season to taste. (Okay, first, use the olive oil sparingly for the sauteing, or you will find yourself with limp, oily veggies. Use a small amount on high heat to stir-fry, more than saute. Second, “reduce white wine” is maddeningly vague. I over-reduced–by more than half–and ended up with a slightly wine-flavored brown butter mixture. It wasn’t as succulent on the dish as I had hoped. Watch the wine.)
Place warmed capellini cake in center of plate, top with halibut and spoon caper-olive-pepper mix over fish. Finish the plate with spoonfuls of butter sauce.
Capellini Cakes
3 c capellini pasta, blanched (How does one measure capellini in a measuring cup? I broke mine into smaller pieces, but I’ll do you the favor of letting you know that I weighed the end result. I would say 8 oz of capellini here should be plenty.)
2 eggs, beaten
1/4 c heavy cream
1/2 c chopped blanched spinach
1/2 t chopped garlic (for the amount of capellini, this seemed light on garlic, so I probably came close to doubling it. Your call, depending upon your love of garlic.)
1 T olive oil (if you end up frying your cakes in batches, reserve half the oil for the second batch)Mix together in a bowl; blanched capellini, beaten eggs, heavy cream, spinach and garlic. (This also begged for the addition of salt, even though I salted the water for the capellini. Maybe just 1/2-1 teaspoon would do.)
Form into cakes (about 1 cup of mixture for each cake) and saute with olive oil in a hot pan four minutes or so each side. (Though this part is very simple, “forming cakes” is a bit of misnomer. I used tongs and grabbed a heap of mixture and formed it into a cake on the hot pan. My husband suggested that if you were looking for symetrical cakes, you could implement the old round cookie cutter/tuna can trick. Put the cutter/can–with both ends cut out–on the hot pan, add the capellini mixture inside. Remove cutter/can when you’re ready to flip and the cake should retain a nearly perfect roundness. I say, who can bother? I’m not catering, I’m feeding the masses here.)
Serves 4
Brussel Sprouts after Brownies? Updated November 2009
Yes, it’s true. I’m going there. Brussels. Sprouts, that is.
Now, when I first met my husband, lo nearly twelve years ago, I knew that we shared an affinity for food. He could cook. I could cook. And boy could we eat! It made for a nice courtship.
I introduced my husband to homemade chocolate pasta with a delicate sauce made from wild dried mushroom. He introduced me to unagi. A fair trade, methinks. I took him to my favorite Mexican restaurant in all the world (Tequila’s, Philadelphia) and he bought me a four pound lobster in Manhattan (Palm, Too). I caused him to rethink olives. He opened my eyes to brussel sprouts.
Romantic, I know.
Knowing his love for the tiny cabbage, I snagged a small brussel sprout seedling to plant in our first garden at our first (and current) house. We watched all summer long, fascinated, unsure of where the actual sprouts would appear. Of course, they ended up growing up along the stalks of the (eventually) great beast, and not long after, our local Whole Foods started carrying brussel sprouts still attached to the stem. Still, there was innocent joy in our ignorance, watching and waiting.
But then, what to do with the prized bulbs, once freed from their stalks? What follows is his tried, true and ultimately tailorable recipe for brussel sprouts on the grill.
First, clean the sprouts. Trim the cut ends back without interferring with the leaves, and peel any withered leaves off the bulb. Score the bottoms (one cut will suffice, as you can see below).

score no more than halfway through
Then place the sprouts in boiling, salted water for no more than five minutes. NO MORE! (That was my husband.) Drain and toss in a bowl with:
a drizzle of oil (vegetable or olive oil)
1/2–1 teaspoon of each: kosher salt, black pepper, onion powder, garlic powder, celery salt
When the sprouts are nice and coated, place on a hot grill (but keep the bowl handy), turning every four minutes for a total of twelve minutes. Remove from the grill back to the seasoning bowl and toss to coat with any remaining seasoning.

firm and flavorful
The brussel sprouts are now done. And so are you.
Unless…you would like to doctor them a bit. In our house this ranges from lemon zest to parmesan cheese to bacon, to all of the above.
See? Tailorable. And you thought that wasn’t a word!
I am reposting this lovely recipe after the good folks at Food52 have selected it as a finalist in the “Brussels Sprouts Recipe” contest. Please, if you haven’t already, visit my recipe on their site and VOTE for my lovely little friends (the Brussels Sprouts, that is!). Thank you.
Hob-knobbing with goblins
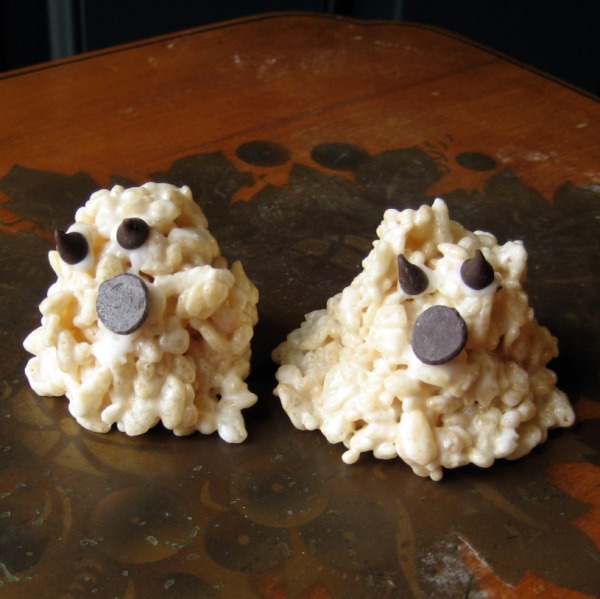
Ghost booooo-ddies
I love all of the fun and spooky food creations I see around the web these days. I have not done a whole lot, other than the sugar cookies from my previous post, and even those have not all been eaten. However, today was my daughter’s Halloween party at school, and I volunteered to bring the sweet snack. Usually I would head straight for my cupcake liners, but while leafing through a parenting magazine, this idea popped out at me. Rice Krispy Treat Ghosts.
I know, I know…the cereal lacks a whole lot in the way of nutrition, and actually breaks one of my cardinal rules by containing high fructose corn syrup. I don’t buy it often…only for making Rice Krispie Treats, and in the past year that means twice. When I have more time, I will research an alternative, most likely a house brand at Whole Foods. For now, I settled. To offset the awful that is Rice Krispies, I used kitchen witch homemade Vanilla Marshmallows, which contain no high fructose corn syrup or blue dye. There is a world of difference in the taste and texture of Rice Krispie Treats made with homemade, fresh marshmallows. You really need to try them. (Be warned, however, that it is hard to stop eating them.) You can buy kitchen witch Vanilla Marshmallows at my Etsy shop or at RegionalBest.com. I make them fresh for every order.
Rice Krispie Treats, in the form of ghosts
3 T unsalted butter
10 oz marshmallows
6 cups Rice Krispie cereal
a handful of mini and regular size chocolate chips. The only mini-size all natural chips I know of are sold at Whole Foods under the name Enjoy Life, I believe.
Thoroughly spray cookie sheet (preferably with non-stick liner) with cooking spray. I used BJ’s brand spray canola oil. Set aside.
Melt butter and marshmallows together. When completely melted, add cereal and stir well to coat.
Once thoroughly mixed, use a cookie scoop to portion out 1/4 cup sized balls of mixture on a the prepared tray. Should make about 24 “blobs.”
Spray hands with cooking spray to work “blobs” into shapes resembling ghosts. If you are really dedicated you can even make bumps at the sides that look like arms. I’ll let you judge for yourselves if I achieved that look with my goblins. And yes, this is where it gets tricky and requires a modicum of artistic skillz. Keep using spray if things start to get sticky.
As ghosts are cooling, use dots of this “Easy Powdered Sugar Icing” where you want to place eyes and mouth. Press in mini chocolate chips for eyes, and an inverted regular size chocolate chip for the mouth. This is where I let my daughter help. We used toothpicks to dot on the icing, and she had a ball decorating with the chocolate chips.
Voila! Rice Krispy Treats that impress everyone, but which really take no time at all.


 Raspberries
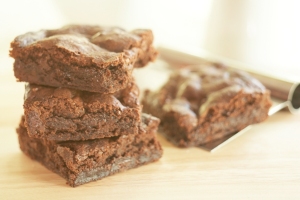





![pom_+_brownie_007_-_Copy[1] Tastespotting: unflattering composition/coloring. not sharp](https://tastestopping.files.wordpress.com/2009/08/pom__brownie_007_-_copy1.jpg?w=250&h=250)
